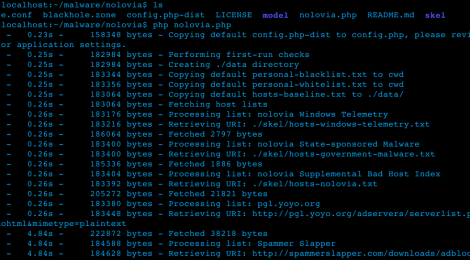
Nolovia is an ad-blocking config file generator for bind, NSD, or other DNS resolvers. It helps you implement a blackholing DNS server or DNS “sinkhole” firewall, by generating configuration files that block potentially malicious servers.
Nolovia ingests several public lists of advertising, tracking, analytics, malware, cryptojacking, and other undesirable servers. These lists are merged and minimized, then exported as a config file suitable for use with the bind or nsd DNS resolvers. A corresponding blackhole zone file is included.
Running your own DNS is a more powerful alternative to hosts file-based ad blocking and tracker blocking.
- A DNS server can blackhole entire domains, even when you don’t know all of their hostnames or subdomains.
- With a local DNS server, you configure your blocking rules in one place, instead of constantly updating a text file on all the devices on your network.
- Unlike
hostsfiles, practically every smartphone will let you configure the DNS server without rooting it or installing custom software.
Using nolovia with bind
- Ensure you already have a working instance of the
bindDNS resolver prior to starting. There are lots of tutorials on installingbindfor your OS. - Make a backup of your existing
named.conffile. - Obtain and run nolovia:
mkdir nolovia && cd nolovia
git clone https://github.com/parseword/nolovia.git .
php nolovia.php
This will generate a file named blackhole.conf.
- Copy
blackhole.confand the includedblackhole.zonefile to locations that suit yourbindinstallation, like/var/named/orc:\bind\. - Edit your
named.confto define an access control list (ACL) named “recursers,” this will determine who’s allowed to query your DNS server recursively. For security purposes, only hosts on your local network should be allowed:acl recursers { localhost; localnets; };
Now look at the options { ... } stanza in your named.conf and find the recursion settings. To enable recursion for the recursers ACL only, set:
recursion yes;
allow-recursion { recursers; };
- Finally, add the following to the end of
named.conf, specifying the path to which you copiedblackhole.conf:include “/var/named/blackhole.conf”;
Restart bind with service named restart or rndc reload as appropriate for your system, and make sure all the devices on your network are set to use your bind instance as their DNS server.
Using nolovia with NSD
- Ensure you already have a working instance of the
NSDDNS resolver prior to starting. There are lots of tutorials on installingNSDfor your OS. - Make a backup of your existing
nsd.conffile. - Obtain nolovia and create its configuration file:
mkdir nolovia && cd nolovia
git clone https://github.com/parseword/nolovia.git .
cp config.php-dist config.php
- Edit config.php to enable
NSDsupport
Out of the box, nolovia’s NSD support isn’t enabled. Open the config.php file in the editor of your choice, and look for this section, which is around line 70 as of this writing:
//nsd (disabled by default)
$r = new ResolverConfiguration('nsd');
$r->setEnabled(false);
...
Change $r->setEnabled(false); to $r->setEnabled(true); and save the file.
- Run nolovia
php nolovia.php
This will generate a file named blackhole-nsd.conf.
- Copy
blackhole-nsd.confto your system’s NSD configuration directory, e.g.
/etc/nsd/conf.d/. The default settings for NSD should automatically load any .conf files in that directory; if this doesn’t occur, you’ll need to edit yournsd.conffile and add the lineinclude: "/path/to/blackhole-nsd.conf". - The nolovia distribution includes a
blackhole.zonefile. Copy this file into your NSDzonesdir, which is probably/etc/nsd/.
Restart NSD with service nsd restart or nsd-control reconfig as appropriate
for your system, and make sure the devices on your network are set to use your NSD instance as their DNS server.
Nolovia is written in PHP and released under an Apache 2.0 License.


